CVE漏洞环境搭建笔记
前言
受vulhub启发,我尝试自己去搭建一个漏洞模拟环境,搭建过程,学习了很多docker的知识,故整理成笔记。
确定目标
去 CVE 、 exploit-db上找一些有趣的漏洞,确定目标。我选择的一个目标是hivemq的存储型xss漏洞,CVE编号为CVE-2020-13821。
信息收集
先去CVE官方网站查看CVE-2020-13821条目https://cve.mitre.org/cgi-bin/cvename.cgi?name=CVE-2020-13821
其中一个引用链接打开,有这么一段话
Vulnerability Description
An issue was discovered on HiveMQ MQTT Broker, The client id of any connected device is not sanitized for XSS in the admin console leading to stored XSS.
有时候网络上是没有针对CVE的更详细说明,只能靠这么点信息自己去摸索。我这个漏洞比较简单,可以比较快速就能找到漏洞在哪里。
CVE的另外一个引用链接是官网的更新链接,此时官方版本是4.3.3, 而存在漏洞的版本是4.3.2
官方的4.3.3的地址为https://www.hivemq.com/blog/hivemq-4-3-3-released/, 在4.3.3版本的changelog中,有说明Security: Fixed the vulnerability of CVE-2020-13821
那么猜测直接把hivemq-4-3-3-released修改为hivemq-4-3-2-released就可以下载存在漏洞的版本了,尝试之后验证可行。
环境搭建
下载完成后,直接点击bat或者sh文件,即可启动hivemq,这是比较直接有效的方法,但是不方便统一管理,按vulhub的逻辑,最好是通过docker部署。
直接通过docker search hivemq搜索已有的hivemq,很容易就搜索到官方的版本,而且更方便的是可以直接通过docker pull 4.3.2版本的hivemq
简单而言就是以下步骤
root@ubuntu:~# docker search hivemq
NAME                                    DESCRIPTION                                     STARS               OFFICIAL            AUTOMATED
hivemq/hivemq4                          HiveMQ is a fast, efficient, secure and reli…   17
hivemq/hivemq-ce                        Official docker image for HiveMQ Community E…   14
hivemq/hivemq3                          Official HiveMQ repository, hosts automatica…   13
因为docker源不是很稳定,我用proxychain挂了一个代理pull会快一些。
root@ubuntu:~# proxychains docker pull hivemq/hivemq4:4.3.2
ProxyChains-3.1 (http://proxychains.sf.net)
4.3.2: Pulling from hivemq/hivemq4
8559a31e96f4: Pull complete
65306eca6b8e: Pull complete
ddbf88050b6e: Pull complete
0cb03c61bf26: Pull complete
503ca5d678bf: Pull complete
7475a0ec6c3d: Pull complete
043f9d984ded: Pull complete
116963d53ed7: Pull complete
443ed3dfdbfe: Pull complete
Digest: sha256:1e8e76ba39ff6d65496b4c6e5740bdef338729e9b77414874b26debb3844febe
Status: Downloaded newer image for hivemq/hivemq4:4.3.2
docker.io/hivemq/hivemq4:4.3.2
root@ubuntu:~#
root@ubuntu:~#
root@ubuntu:~# docker images | grep hivemq
hivemq/hivemq4      4.3.2               2e2e96122acb        8 months ago        295MB
root@ubuntu:~# docker run -p 8080:8080 -p 8000:8000 -p 1883:1883 hivemq/hivemq4:4.3.2
Getting bind address from container hostname
set bind address from container hostname to 172.17.0.2
-------------------------------------------------------------------------

                  _    _  _              __  __   ____
                 | |  | |(_)            |  \/  | / __ \
                 | |__| | _ __   __ ___ | \  / || |  | |
                 |  __  || |\ \ / // _ \| |\/| || |  | |
                 | |  | || | \ V /|  __/| |  | || |__| |
                 |_|  |_||_|  \_/  \___||_|  |_| \___\_\

-------------------------------------------------------------------------


root@ubuntu:~# netstat -tlnp | grep docker
tcp6       0      0 :::5000                 :::*                    LISTEN      14917/docker-regist
tcp6       0      0 :::8080                 :::*                    LISTEN      20647/docker-proxy
tcp6       0      0 :::1883                 :::*                    LISTEN      20675/docker-proxy
tcp6       0      0 :::8000                 :::*                    LISTEN      20661/docker-proxy
看到上面开启的端口说明hivemq已经跑起来了
漏洞验证
正常访问livemq页面
在环境配置好后,访问A机器的8080端口,如下图所示
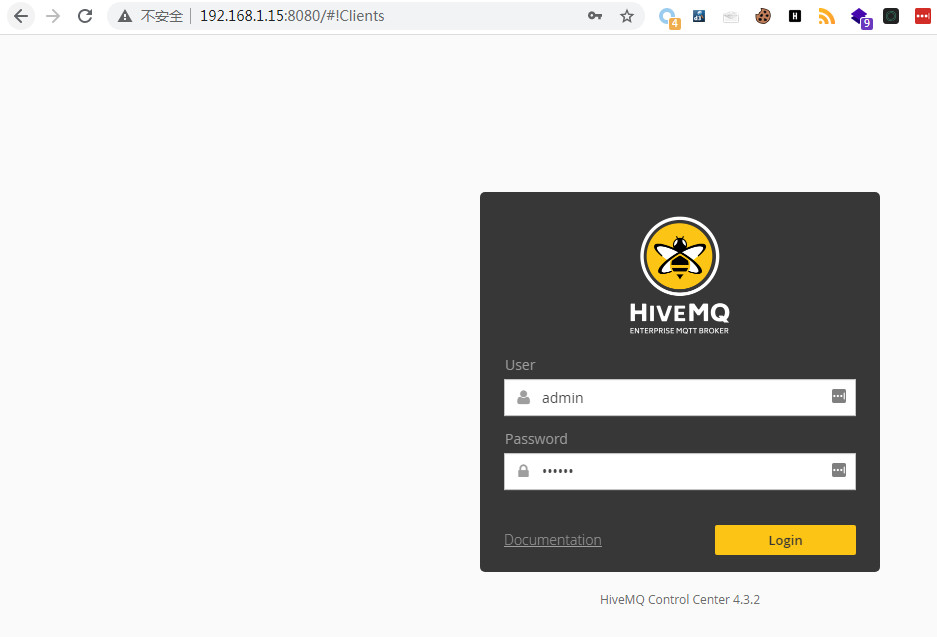
输入账户密码 admin / hivemq
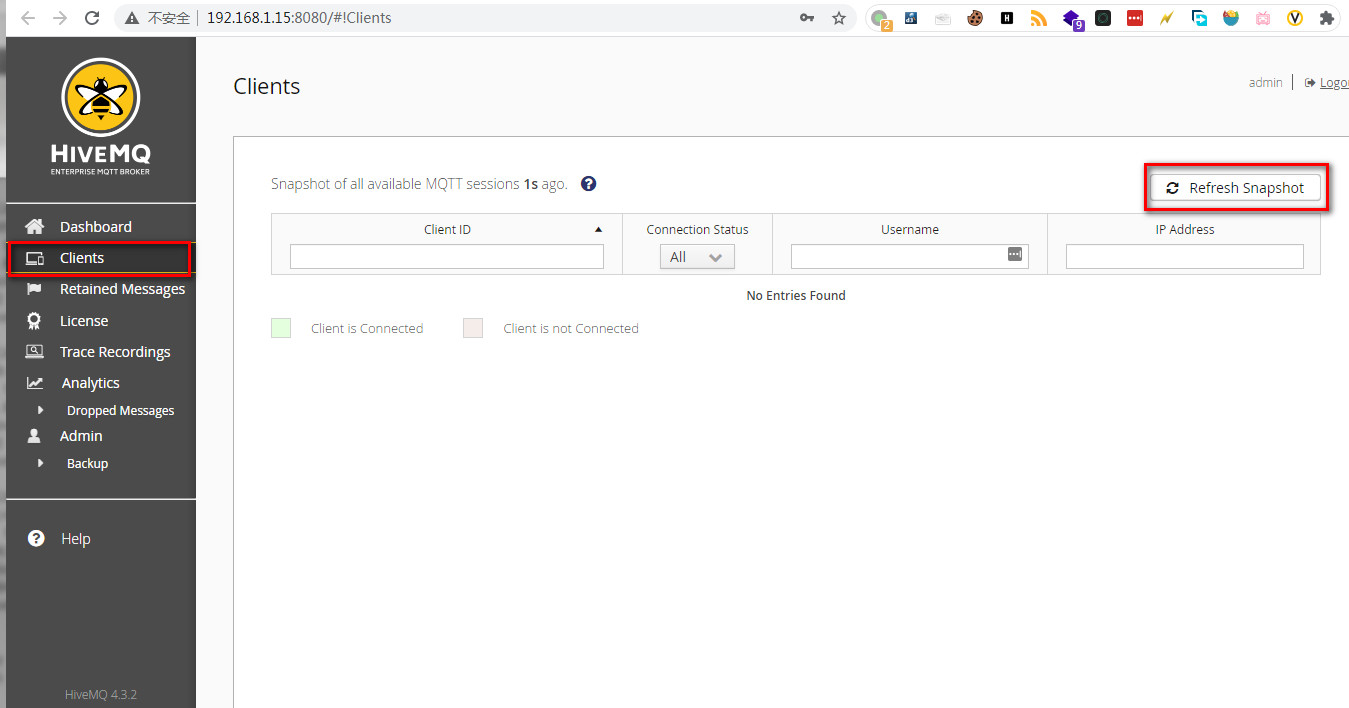
点击左侧Clients,查看所有连接的客户端, 如下图所示
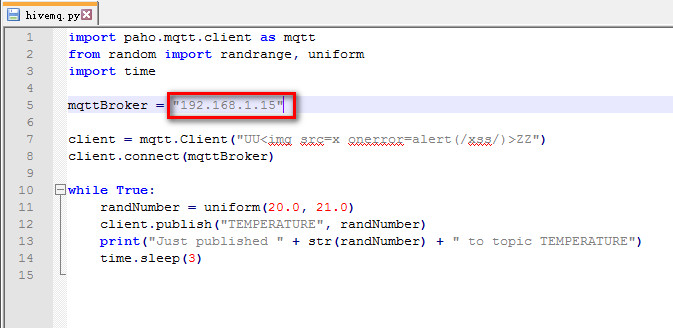
运行PoC
编辑poc脚本,把ip修改为A机器的ip,如下图所示
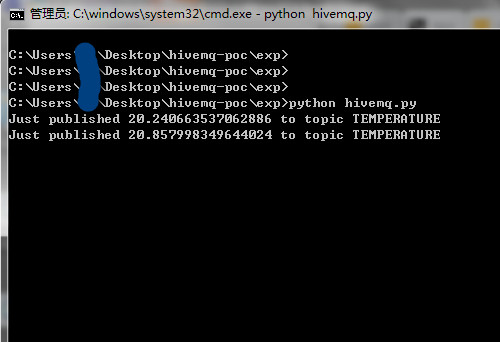
在终端运行poc脚本,如下图所示
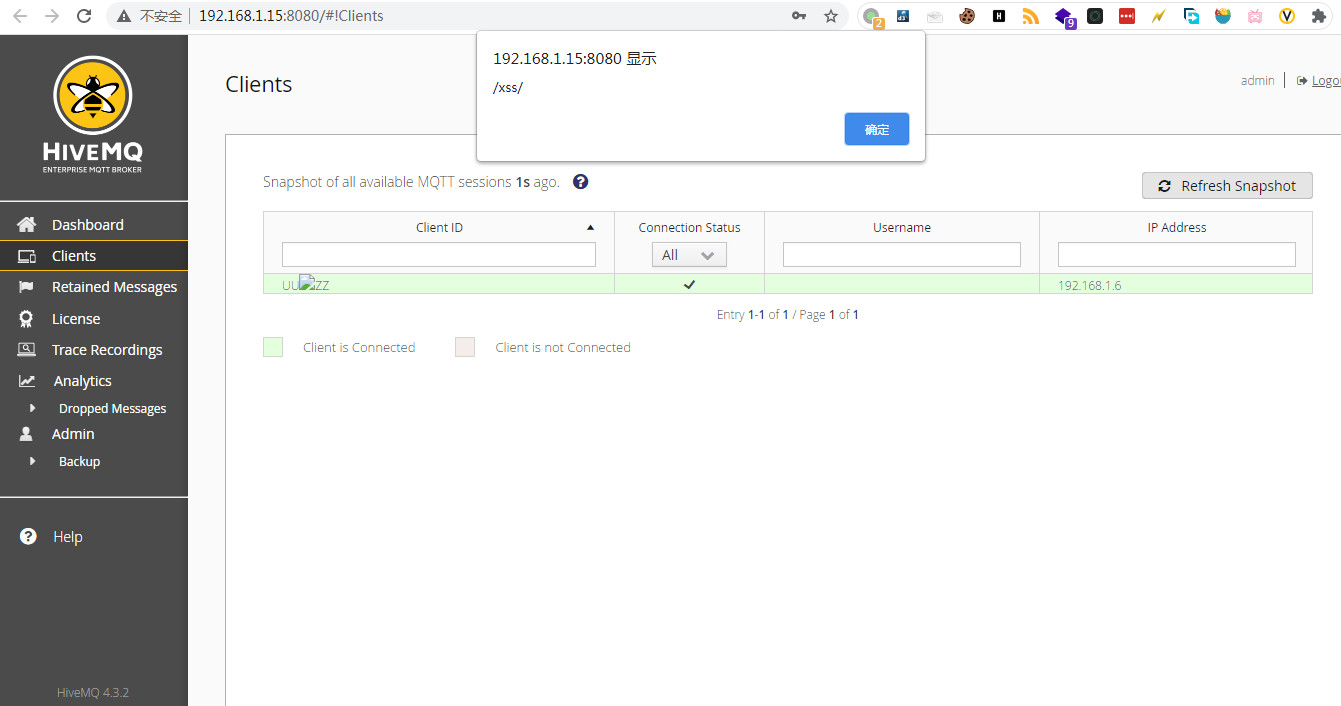
XSS弹窗
在Web界面,重新刷新客户端界面,点击“Refresh Snapshot”,可以看到弹窗,如下图所示
docker化部署
dockerfile 构建部署
docker化部署有几个要件,dockerfile,docker-compose.yml,docker backup 文件。
因为官方维护了4.3.2版本的hivemq,所有dockerfile基本不用定制,直接写成
root@ubuntu:~# cat dockerfile
FROM hivemq/hivemq4:4.3.2
root@ubuntu:~#
root@ubuntu:~#
root@ubuntu:~#
root@ubuntu:~#
root@ubuntu:~# docker build -f dockerfile -t hivemq4:4.3.2 .
Sending build context to Docker daemon  34.82kB
Step 1/1 : FROM hivemq/hivemq4:4.3.2
4.3.2: Pulling from hivemq/hivemq4
8559a31e96f4: Pull complete
65306eca6b8e: Pull complete
ddbf88050b6e: Pull complete
0cb03c61bf26: Pull complete
503ca5d678bf: Pull complete
7475a0ec6c3d: Pull complete
043f9d984ded: Pull complete
116963d53ed7: Pull complete
443ed3dfdbfe: Pull complete
Digest: sha256:1e8e76ba39ff6d65496b4c6e5740bdef338729e9b77414874b26debb3844febe
Status: Downloaded newer image for hivemq/hivemq4:4.3.2
 ---> 2e2e96122acb
Successfully built 2e2e96122acb
Successfully tagged hivemq4:4.3.2
接下来回到上面“环境搭建”章节,执行下面的命令运行即可
root@ubuntu:~# docker run -p 8080:8080 -p 8000:8000 -p 1883:1883 hivemq/hivemq4:4.3.2
因为本漏洞docker环境比较简单,官方在维护,所有dockerfile不复杂,也不牵涉到docker-compose。
如果一个漏洞环境牵涉到多个docker image时,就需要用到docker compose,比如一个LAMP环境,就需要docker compose综合部署。关于docker系列的知识,后续有时间再写一篇专门介绍。
docker backup离线部署
docker还有一个功能是把image save为一个离线tar包。当在某些离线场景中,可以通过docker load加载镜像构建环境。
上面“dockerfile 构建部署”章节,我们根据自己写的dockerfile build了一个镜像hivemq4:4.3.2
root@ubuntu:~# docker images
REPOSITORY          TAG                 IMAGE ID            CREATED             SIZE
hivemq4             4.3.2               2e2e96122acb        8 months ago        295MB
通过save保存为tar文件
root@ubuntu:~# docker save -o hivemq4.3.2.tar hivemq4:4.3.2
root@ubuntu:~#
root@ubuntu:~#
root@ubuntu:~#
root@ubuntu:~#
root@ubuntu:~# ls -alh hivemq4.3.2.tar
-rw------- 1 root root 286M Mar 27 23:19 hivemq4.3.2.tar
可以通过docker load恢复为image,再通过docker run跑起来
root@ubuntu:~# docker images
REPOSITORY          TAG                 IMAGE ID            CREATED             SIZE
root@ubuntu:~#
root@ubuntu:~#
root@ubuntu:~#
root@ubuntu:~#
root@ubuntu:~# docker load -i hivemq4.3.2.tar
13cb14c2acd3: Loading layer [==================================================>]  72.49MB/72.49MB
94cf29cec5e1: Loading layer [==================================================>]  9.079MB/9.079MB
9fc268fda517: Loading layer [==================================================>]  3.584kB/3.584kB
65be02c43d23: Loading layer [==================================================>]  126.7MB/126.7MB
3a49669c8ec8: Loading layer [==================================================>]  12.56MB/12.56MB
4b64d92cd3c0: Loading layer [==================================================>]  3.072kB/3.072kB
32fd1538d094: Loading layer [==================================================>]  4.608kB/4.608kB
e52993f4c7bd: Loading layer [==================================================>]  78.74MB/78.74MB
46336b9dac90: Loading layer [==================================================>]  7.168kB/7.168kB
Loaded image: hivemq4:4.3.2
root@ubuntu:~#
root@ubuntu:~#
root@ubuntu:~#
root@ubuntu:~#
root@ubuntu:~# docker images
REPOSITORY          TAG                 IMAGE ID            CREATED             SIZE
hivemq4             4.3.2               2e2e96122acb        8 months ago        295MB
注意load时无法指定镜像名和TAG,如果docker save的时候是以镜像名的方式,则load后的镜像名和TAG和save时一致。
如果docker save的时候是以镜像id的方式,则load的image的REPOSITORY TAG都是None,需要重新用docker tag命名和设置标签。
当前image镜像
root@ubuntu:~# docker images
REPOSITORY          TAG                 IMAGE ID            CREATED             SIZE
hivemq4             4.3.2               2e2e96122acb        8 months ago        295MB
save为tar包
root@ubuntu:~# docker save -o hivemq4.tar 2e2e96122acb
root@ubuntu:~# ls -alh hivemq4.tar
-rw------- 1 root root 286M Mar 27 23:45 hivemq4.tar
删除当前镜像
root@ubuntu:~# docker image rm 2e2e96122acb
Untagged: hivemq4:4.3.2
Deleted: sha256:2e2e96122acb0fe97691ce62379a058085a0da4b14a5deae07e7c6f5e1945dd3
Deleted: sha256:5f9d4984f61829428b8979b7d3b217eea54766256a04fd63482350678e2ba672
Deleted: sha256:b1b552f268fa796f28c7e640e608b040976595709fed15f9fff7c80bffa93f14
Deleted: sha256:3f8b2810ab3650c23abf564dcb820d1a2cedbf71b0b9c93663e93dca228dee0e
Deleted: sha256:56a2212894ca1fd1a056d975f571cc2db792efbf0cf8a3401797b5d3fc940538
Deleted: sha256:47bfc0e4bfa383a5c154545c8e34492ffe3daa292cd85dca06f6df9482664248
Deleted: sha256:251d9ccddef48c643b282f24a2ee7954e49cbf3a6359ba7a8263d14bff313011
Deleted: sha256:08ac5449213247795c170b774867931c548ff27036520a2a0793ee6a03fa491c
Deleted: sha256:e47aeb6e542620774a5364aff59e1593a8131532980b7dda9c772bfc04979678
Deleted: sha256:13cb14c2acd34e45446a50af25cb05095a17624678dbafbcc9e26086547c1d74
load tar包并查看镜像
root@ubuntu:~# docker load -i hivemq4.tar
13cb14c2acd3: Loading layer [==================================================>]  72.49MB/72.49MB
94cf29cec5e1: Loading layer [==================================================>]  9.079MB/9.079MB
9fc268fda517: Loading layer [==================================================>]  3.584kB/3.584kB
65be02c43d23: Loading layer [==================================================>]  126.7MB/126.7MB
3a49669c8ec8: Loading layer [==================================================>]  12.56MB/12.56MB
4b64d92cd3c0: Loading layer [==================================================>]  3.072kB/3.072kB
32fd1538d094: Loading layer [==================================================>]  4.608kB/4.608kB
e52993f4c7bd: Loading layer [==================================================>]  78.74MB/78.74MB
46336b9dac90: Loading layer [==================================================>]  7.168kB/7.168kB
Loaded image ID: sha256:2e2e96122acb0fe97691ce62379a058085a0da4b14a5deae07e7c6f5e1945dd3
root@ubuntu:~# docker images
REPOSITORY          TAG                 IMAGE ID            CREATED             SIZE
<none>              <none>              2e2e96122acb        8 months ago        295MB
发现镜像名为none,重新设置镜像名和TAG
root@ubuntu:~# docker tag 2e2e96122acb hivemq:4.3.2
root@ubuntu:~# docker images
REPOSITORY          TAG                 IMAGE ID            CREATED             SIZE
hivemq              4.3.2               2e2e96122acb        8 months ago        295MB
docker关系图
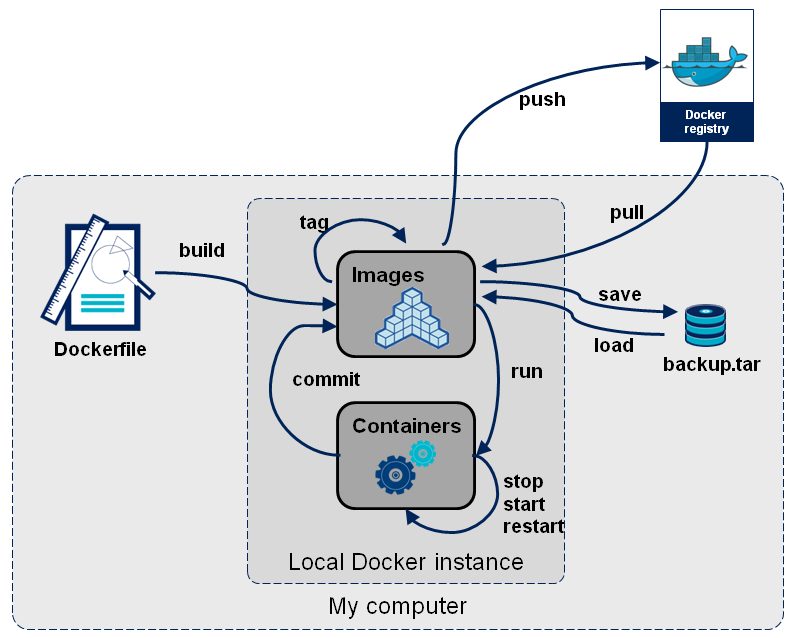 这张图非常清晰准确的说明了docker各个模块之间的关系,一图胜千言。
结尾
发明创造docker的人真的非常聪明,docker这套工具用起来很顺手,关于docker还有非常多的知识需要探索学习,后期有机会写一篇docker的文章。